Body butter can be expensive; unless you buy more natural formulas, it can be filled with unknown ingredients you don’t need on your skin. It is, however, surprisingly easy to make at home, and if you want that fluffy whipped texture, this is the recipe for you!
This recipe is made with Shea butter, a superfood for the skin. Shea butter is a fat extracted from the nuts of the shea tree, which is native to West Africa. It is known for its creamy texture and ability to moisturize the skin deeply.
Shea butter is packed with essential fatty acids, antioxidants, and vitamins A, E, and F, making it a powerful ingredient for healthy skin. You can also experiment with other types of plant butter; find these posts on Murumuru, Capuacu, and Tucuma. They all have fantastic properties for the skin and can be combined with other oils and butter for unique homemade creations!
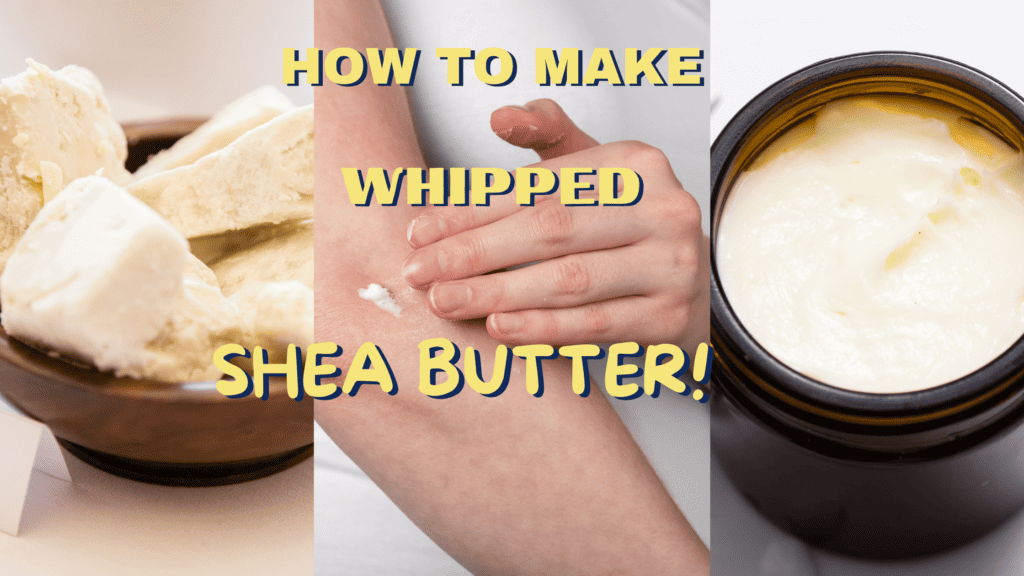
Shea butter is fantastic for making a whipped natural moisturizer, as it is soft and packed with nourishing properties, which, when whipped, transforms into a luxurious cream that will leave your skin feeling soft, smooth, and radiant!

Whipped Shea Butter Recipe!
Whipped shea butter cream is light and fluffy, making it easy to apply and absorb into the skin. By whipping the shea butter, you can create a luxurious cream that can be used for various purposes, including moisturizing dry skin, soothing irritated skin, and even reducing the appearance of stretch marks and scars.
Ingredients.
- One cup of raw shea butter. Start with high-quality, unrefined shea butter. Look for organic and fair-trade options if possible, as they tend to be more pure and ethically sourced.
- Two tablespoons of jojoba oil (or your preferred carrier oil). Popular choices include Argan, sweet almond, and coconut oil. Feel free to experiment and find the best combination for your skin type.
- One teaspoon of vitamin E oil
- One or two tablespoons of Arrowroot powder, optional but makes the formula less greasy!
- 10-15 drops of your favorite essential oil (optional). Try these, as they are great for the skin!
- A double boiler (or a heatproof bowl and saucepan)
- A hand mixer or stand mixer
- A clean, airtight container for storage

How To Prepare The Shea Butter
1. Fill the bottom of the double boiler with water and place it on medium heat. If you don’t have a double boiler, use a heatproof glass bowl over a saucepan filled with water.
2. Add the shea butter to the top pan/bowl and slowly melt. Stir occasionally to ensure even melting.
3. Once the shea butter has completely melted, remove it from the heat and set it aside to cool in the fridge for about 15-20 minutes. It should still be semi-solid, leaving a dent as you put your finger on it.
How To Whip The Shea Butter
1. Transfer the semi-solid shea butter into the mixing bowl of your hand or stand mixer.
2. Add the jojoba oil and vitamin E oil to the bowl.
3. Add 10-15 drops of your favorite essential oil for a desired fragrance.
4. Start the mixer on low speed, gradually increasing to medium-high speed.
Whip the mixture for 5-7 minutes or until it reaches a fluffy, creamy consistency. Be patient; the transformation will happen!
5. Pause and scrape down the sides of the bowl using a spatula to ensure all the ingredients are well incorporated.
6. Continue whipping for 2-3 minutes until the mixture is light, airy, and resembles whipped cream.
How To Store And Use Whipped Shea Butter Cream.
1. Transfer the whipped shea butter cream into a clean, airtight container.
2. Store it in a cool, dry place away from direct sunlight.
3. Apply the cream generously to your body, focusing on dry areas like elbows, knees, and heels.
4. Massage the cream into your skin until fully absorbed. Enjoy the luxurious feel and moisturizing benefits!
Tips and Variations.
Make sure to use raw shea butter for maximum benefits. Refined shea butter may not have the same nourishing properties.
For an extra boost of moisture, add a tablespoon of coconut oil, which has incredible skincare benefits, or cocoa butter to the mixture during the whipping process. Read this post on some of the best oils for the skin.
Experiment with different essential oils; these have fantastic skincare benefits to create unique scents and therapeutic benefits based on your skin’s preferences and needs.
Feel free to adjust the quantities of carrier and essential oils to suit your preferences.
Pour it into smaller decorative jars and add a personalized touch.
This whipped shea butter cream is a perfect gift for friends and family; it can be used on the face, body, and hair. It is suitable for all skin types, including sensitive skin.
Conclusion.
Making your own whipped shea butter cream is a fun and rewarding process. Follow this step-by-step guide to create a personalized skincare product free from harmful chemicals and tailored to your skin’s needs.
DIY beauty is easy, inexpensive, and allows you to create luxurious, homemade skincare with high-quality ingredients that benefit your skin, leaving it feeling nourished, moisturized, and pampered!
This post contains affiliate links. If you purchase through these links, we may receive a small commission, not affecting your sale.
Glowitgreen.com is a member of the Amazon affiliate link program.